
How to bulk upload an existing asset list
You bulk upload assets once, and the state of the spreadsheet on that day decides how much cleanup you live with afterwards. Bulk upload is how a two thousand line spreadsheet becomes a working register in an afternoon. It is also how two thousand errors enter a register in an afternoon. The difference is entirely in the preparation, which is what this guide is about.
Before you start
- Your existing asset list in a spreadsheet, with one asset per row and no merged cells.
- Categories, locations and departments already created in Settings, spelled exactly as they appear in your spreadsheet.
- A decision on asset numbering, because the upload will carry whatever numbers are in the file.
- A backup copy of the spreadsheet before you start editing it. You will be doing find and replace operations you may want to undo.
How to bulk upload assets, step by step
-
Clean the spreadsheet before you go anywhere near the system
This is where the work is. A bulk upload does exactly what the file tells it to, so the file has to be right.
Delete every heading row, subtotal row, blank separator row and note. The file should be one header row followed by pure data.
Unmerge every merged cell. Merged cells are the single most common cause of a failed upload, because a merged cell means one row is silently claiming to be several.
Split any column that holds two things. A column reading Dell laptop, ICT, Head Office has to become three columns.
Standardise your category, location and department spellings. Head Office, head office and HO are three different values as far as any system is concerned. Use find and replace, then sort each column and read down it. Inconsistencies are obvious when sorted and invisible when not.
-
Fix dates and numbers
Dates cause more upload failures than anything except merged cells. Put every date column into a single unambiguous format and keep it consistent. Mixed day-month-year and month-day-year data in one column will import, and it will be wrong, and nobody will notice until depreciation looks strange.
Strip currency symbols, thousands separators and stray spaces from cost columns. A cost field should contain a number and nothing else. Where a cost is genuinely unknown, leave the cell empty rather than entering zero. Zero is a claim; empty is an admission.
-
Check asset numbers for duplicates
Sort by asset number and look for repeats. Legacy spreadsheets very often contain duplicates, usually because the same asset was entered by two departments, or because a number was reused after an asset was disposed of.
Resolve every duplicate before uploading. A duplicate in the file becomes a duplicate in the register, and a duplicate in the register becomes two physical tags with the same number, which is genuinely difficult to unpick later.
-
Open Bulk Upload and follow the template
Under Admin in the left navigation, open Bulk Upload. Use the template structure the page provides and map your columns onto it. Do not improvise column names; the upload matches on the expected headers.
If your spreadsheet has columns the system does not hold, decide whether they matter. Useful extra detail can go into the notes field. Everything else can stay in the archived spreadsheet.
-
Upload a test batch of twenty rows first
Never upload the whole file first. Cut twenty representative rows into a separate file, including at least one row from each category, and upload that.
Then open the Asset Register and inspect those twenty records properly. Check that dates read correctly, costs landed in the right field, categories mapped as intended, and locations are not now called something slightly different. Twenty rows is the cheapest quality check you will ever run.
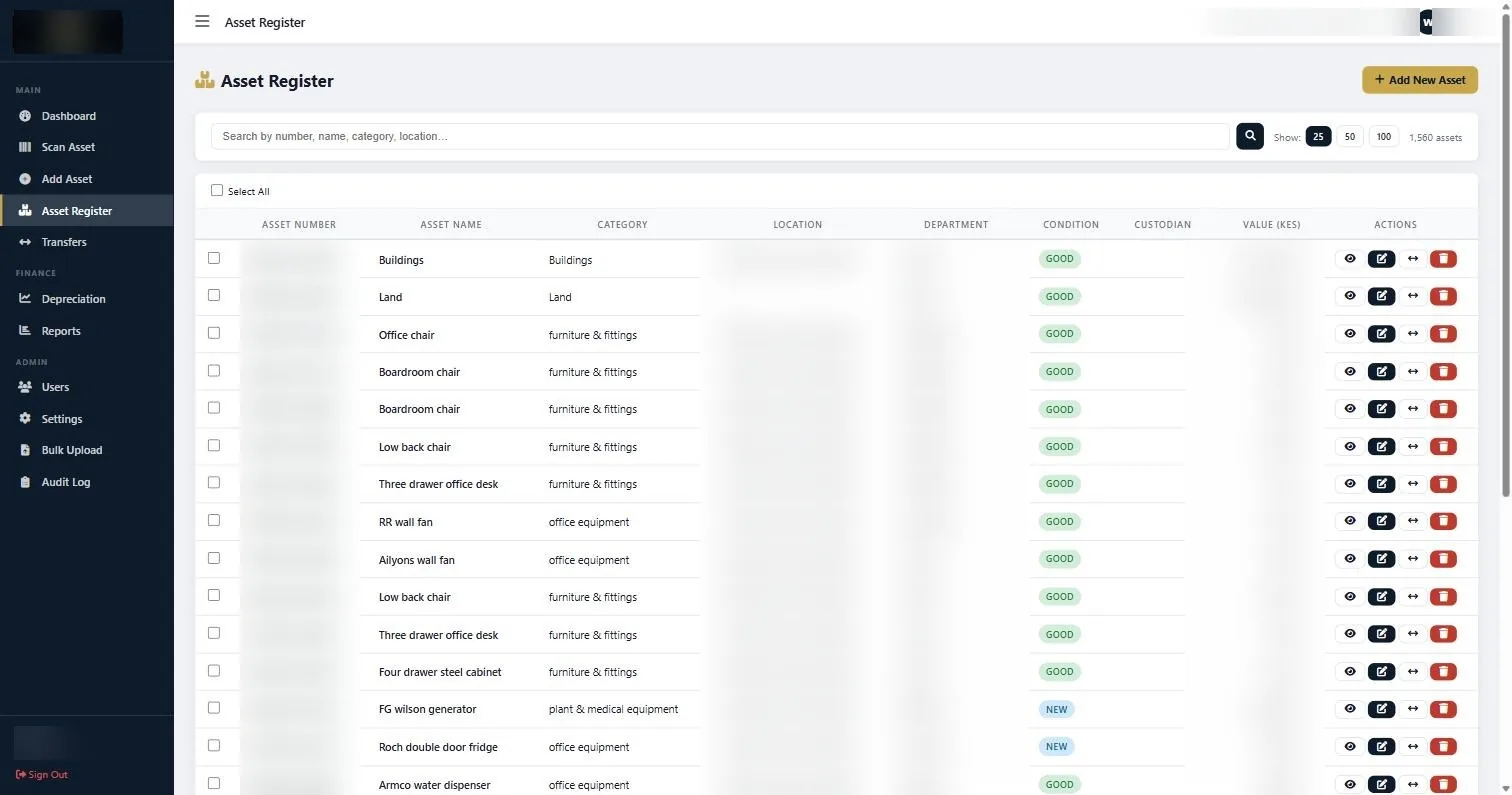
The Asset Register after import. Check the test batch here before uploading the remainder. -
Upload the remainder and reconcile the count
Once the test batch is clean, upload the rest. Then compare the total asset count on the Dashboard against the number of data rows in your file. If they do not match, something was rejected or something was duplicated, and it is far easier to find now than in six months.
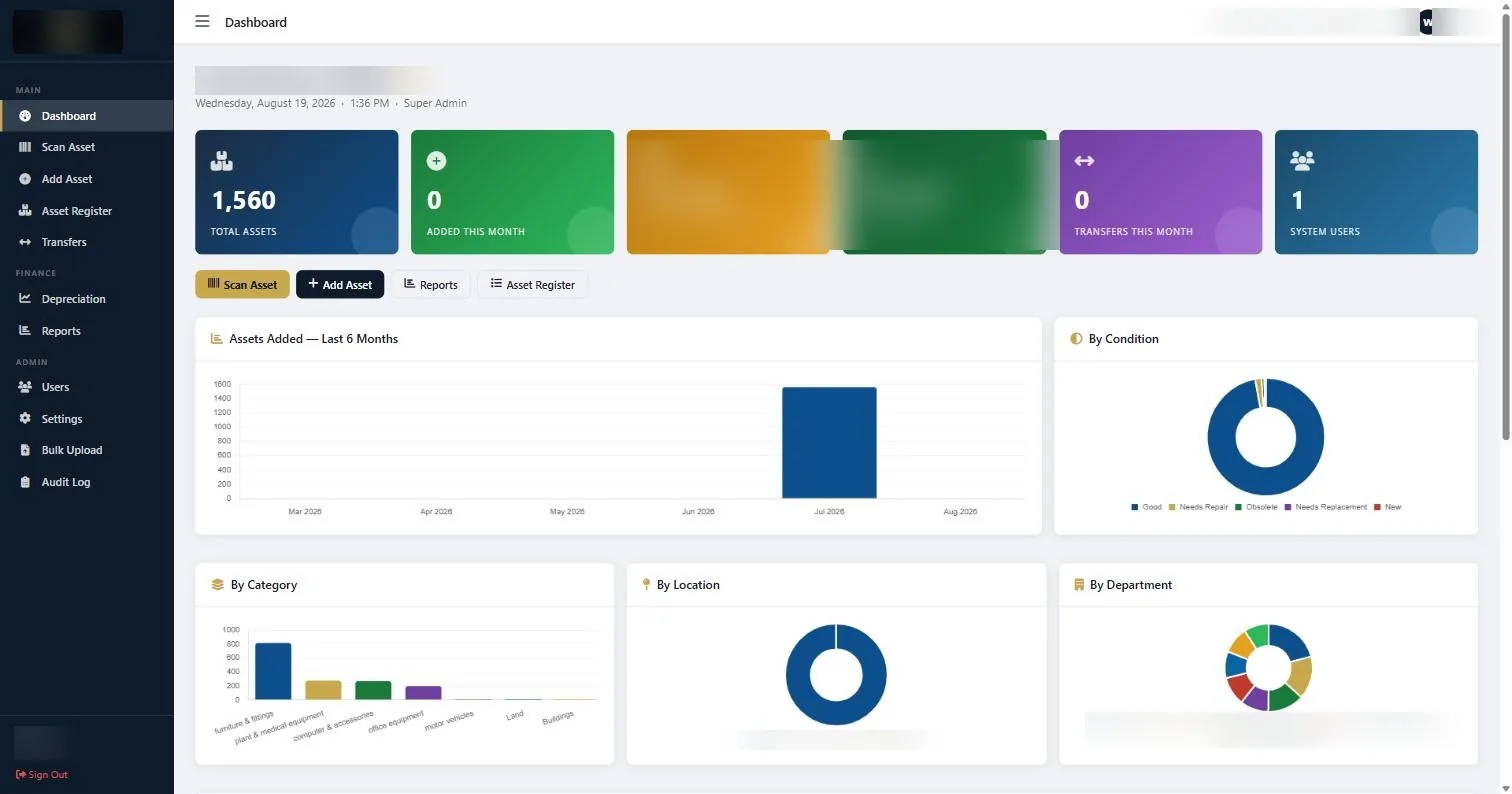
The dashboard total after loading. Reconcile it against the row count in your source file. -
Verify a sample physically
An upload proves the data moved. It does not prove the data was ever true. Pick one location, walk it, and check what is physically there against what the register now says.
If your legacy spreadsheet had never been verified, expect discrepancies. That is not a failure of the upload, it is the reason the upload was worth doing.
If something does not look right
| What you are seeing | Why | What to do |
|---|---|---|
| The upload fails with no obvious reason | Almost always merged cells, a blank row in the middle of the data, or a stray total row at the bottom. | Open the file, press through to the last row, and delete everything that is not asset data. Unmerge all cells. |
| Locations imported as new values instead of matching existing ones | The spelling in the file does not exactly match the value in Settings. | Standardise the spelling in the spreadsheet to match Settings exactly, then re-upload the affected rows. |
| Dates look wrong after import | Mixed date formats in the source column. | Fix the format in the spreadsheet, not in the system. Re-import the affected rows rather than editing them one by one. |
| More assets in the system than in the file | The file was uploaded twice, or partially uploaded then re-uploaded in full. | Sort the register by asset number, identify the duplicates, and remove the second set. Then re-check the count. |
Worth knowing
- Prepare the spreadsheet as though you will never get a second chance, because correcting after import is far slower than correcting before.
- Sort every text column and read down it before uploading. Inconsistent spellings jump out when sorted.
- Keep the original file untouched and work on a copy, so you can always go back to what you were given.
- If the legacy data is more than about thirty per cent unreliable, consider tagging from scratch instead. Importing bad data legitimises it.
Common questions about bulk upload assets
How many assets can be uploaded at once?
Practically, a few thousand rows at a time is comfortable. If your file is very large, split it by site or category, which also makes reconciliation easier.
Can I upload again to update existing assets?
Treat bulk upload as a loading tool rather than an update tool. Updating existing records through repeated uploads is how duplicates appear. Edit records individually, or ask us before running a corrective upload.
What if I do not have purchase costs for old assets?
Leave the cell empty and record how you intend to value those assets. Many organisations run a valuation exercise for legacy items separately. Do not enter zero.
Should I import assets that have already been disposed of?
No. Import what physically exists. A register that carries disposed assets is the exact problem you are trying to solve.
Can STL do the upload for us?
Yes. If we tagged the assets, we hand over the register already loaded. If you are bringing your own historical list, we can clean and load it as part of the engagement.
Will the upload create the asset tags?
No. The upload creates the records. Physical tags are produced separately, printed to your numbering scheme, and fitted to the assets.
If the spreadsheet is in poor shape, it is usually faster to have us clean and bulk upload assets for you than to fix the file twice.
Related guides
Ready to get your assets under control?
Call us to discuss your organisation, or email your asset list and we’ll scope it for you.